Welcome to Computer Programming for Lawyers!
Update 2023: This overview was created in 2021. Replit has had some small user interface changes and feature upgrades, so the screenshots below may look slightly different. Everything described below should remain unchanged.
This class will make heavy use of on two online services, Canvas (with Panopto) and replit.com. Canvas and Panopto will be where you will find videos, discussions, and hyperlinks to Zoom sessions. All of your coding (writing, debugging, running, submitting, and grading) will occur in replit.com.
replit.com is a cloud-based service that lets you write and run code directly in your web browser. It supports more than fifty programming languages, but it originated as a platform for Python, the language we use in this class.
Setting up a Replit.com account and connecting to the class account
Visit https://replit.com/signup and follow the prompts to create a user account using your Georgetown Google account (click the Google icon).
Once you’re done, hit the + Create button in the top left. Choose to create a new Python project. replit.com will automatically choose a random name for your project, or you can pick one yourself. Note that by default your repl will be public to anyone on the internet; this is great for sharing and collaboration, but we’ll have to be careful to not include passwords or other sensitive information in any of our projects.
Once your project is created, you’ll be taken to a new view with several panes. Let’s take a look at what these are.
Understanding the replit.com panes
replit.com provides what is known as an Integrated Development Environment, or IDE. The main user interface, which you will stare at for dozens of hours this semester, looks like this:
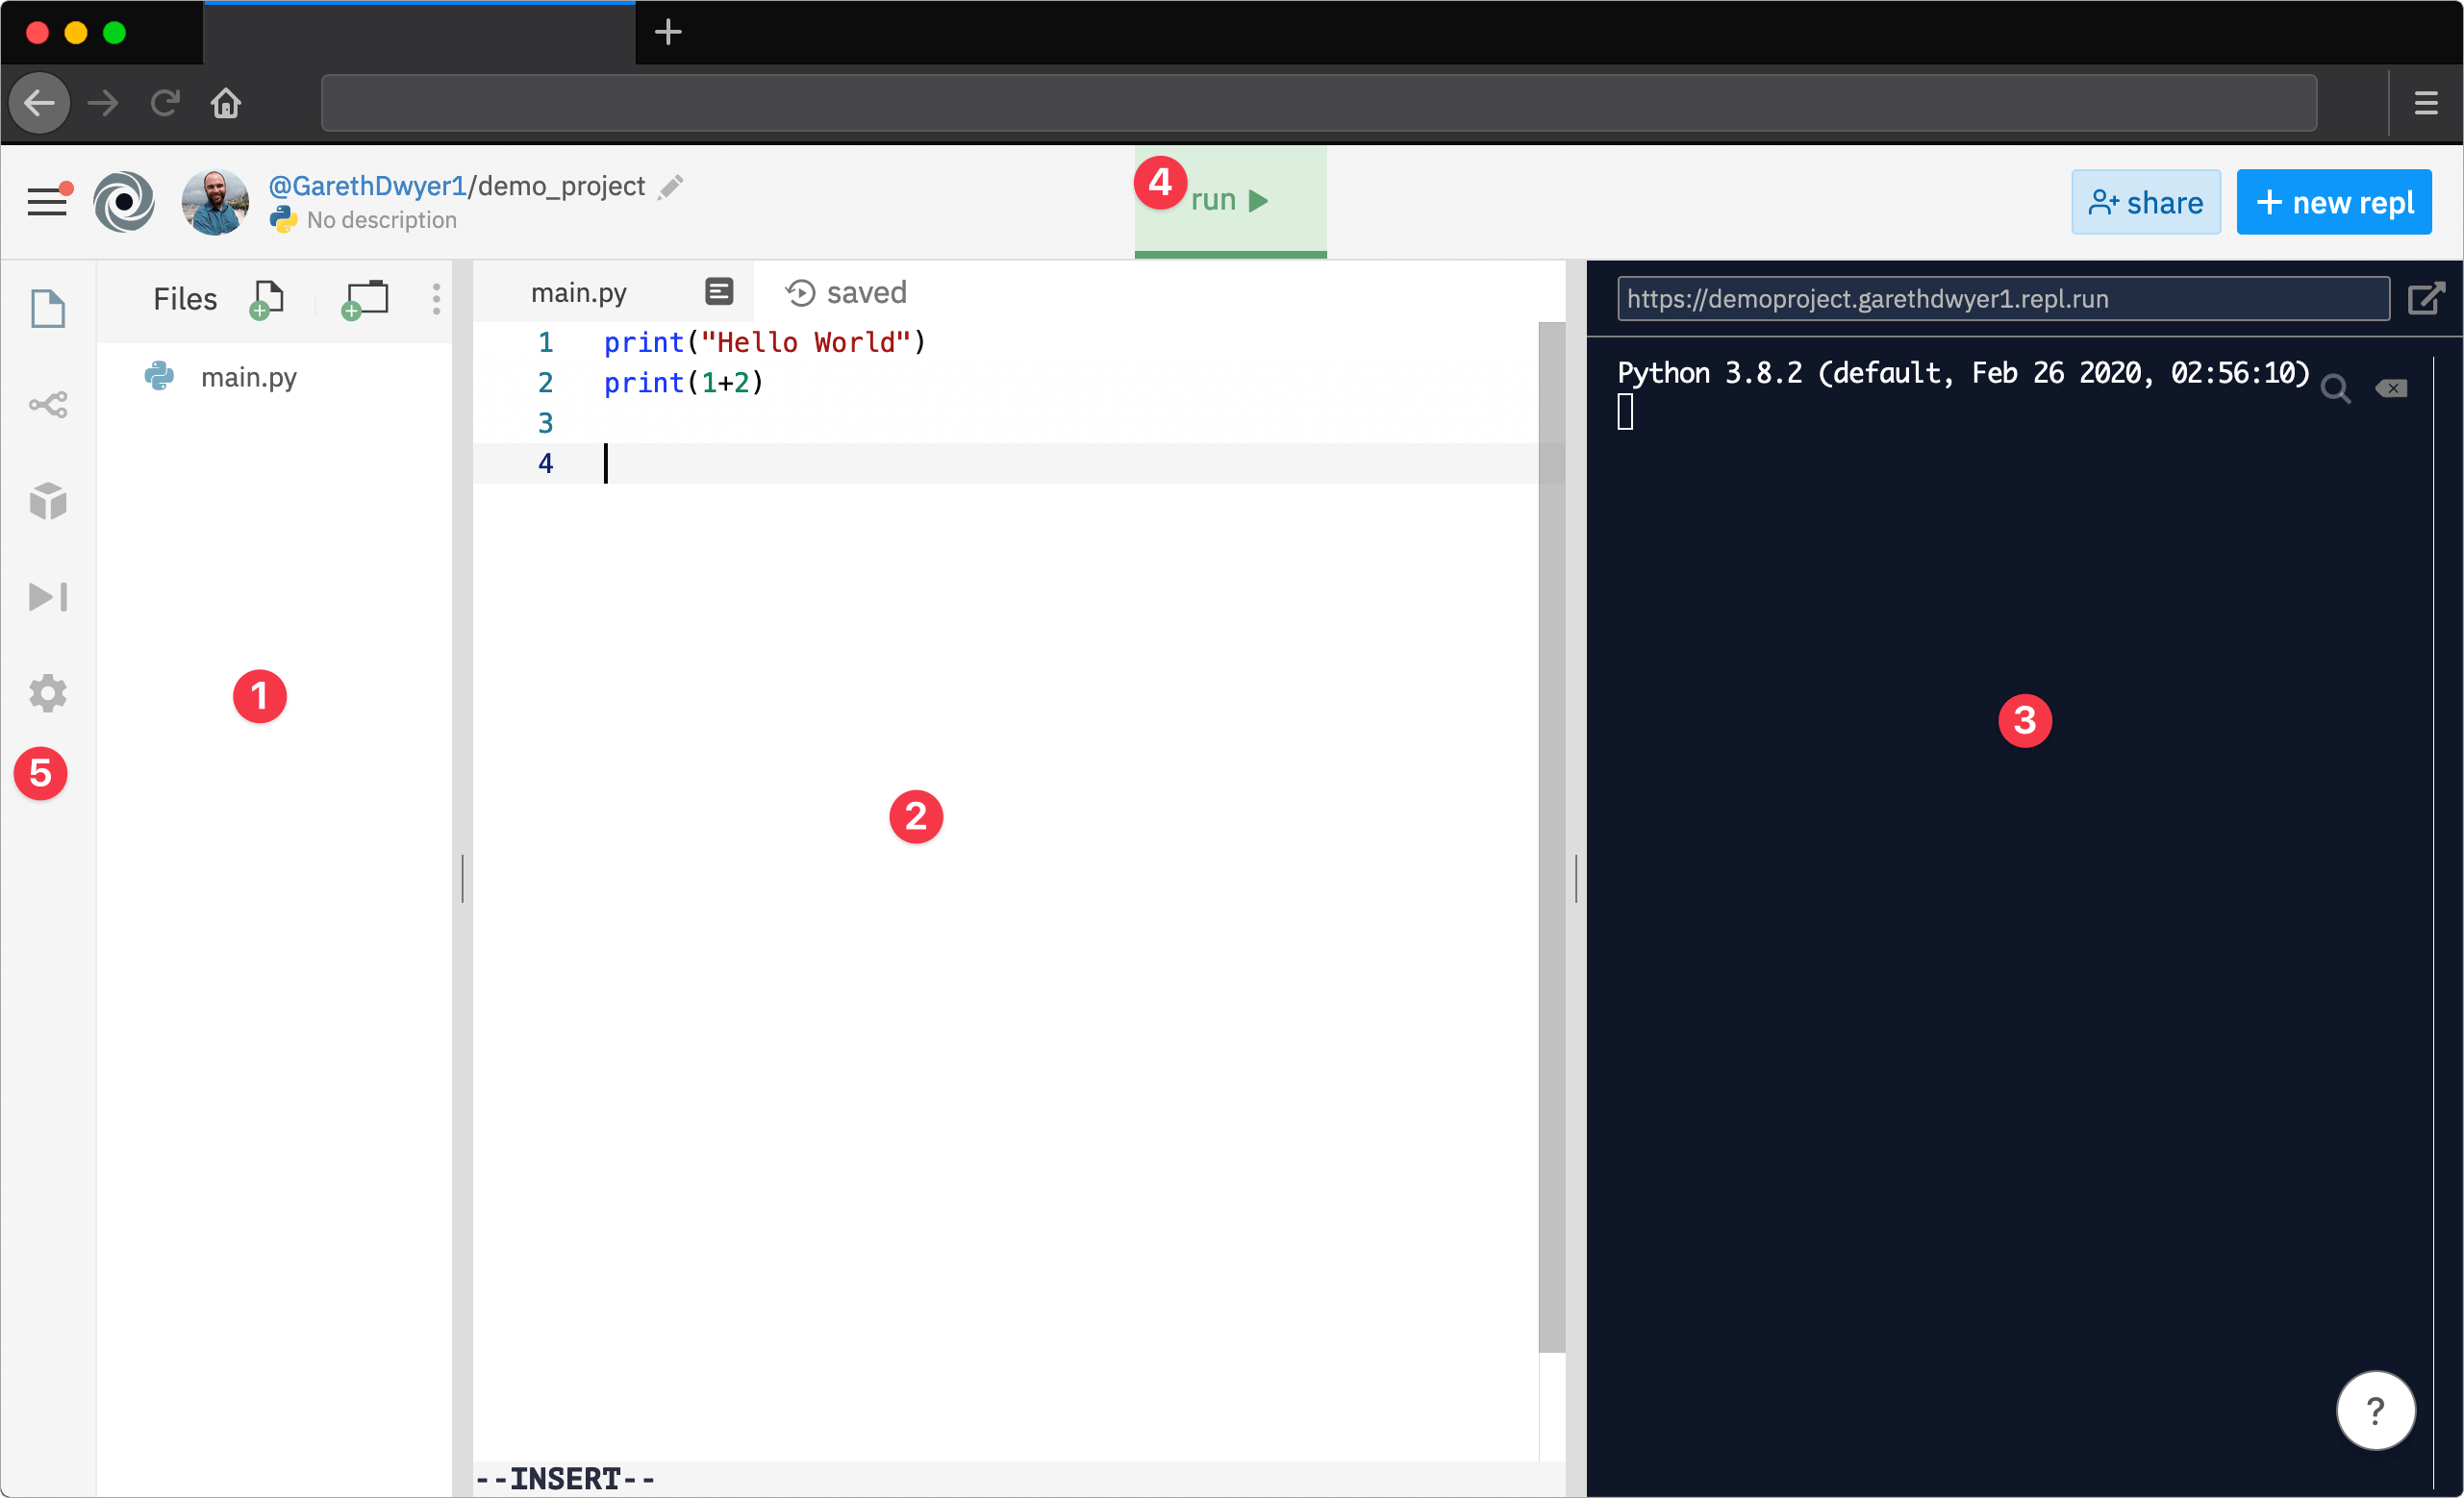
- Left pane: files and configuration. This, by default, shows all the files that make up your project. Sometimes we will give you a few files to use as a starting point. Other times, you will create new projects from scratch, starting with a single file called main.py.
- Middle pane: code editor. You’ll probably spend most of your time using this pane. It’s a text editor where you can write code. In the screenshot, we’ve added two lines of Python code.
- Right pane: output sandbox. This is where you’ll see your code in action. All output that your program produces will appear in this pane, and it also acts as a quick sandbox to run small pieces of code, which we’ll look at more later.
- Run button. If you click the big green run button, your code will be executed and the output will appear on the right.
- Menu bar. This lets you control what you see in the main left pane (pane 1). By default, you’ll see the files that make up your project but you can use this bar to view other things here too by clicking on the various icons. We’ll take a look at these options later.
Running code from a file
Usually, you’ll enter your code as text in a file, and run it from there. Let’s do this now. Enter the following code in the middle pane (pane 2), and hit the run button.
print("Hello World")
print(1+2)
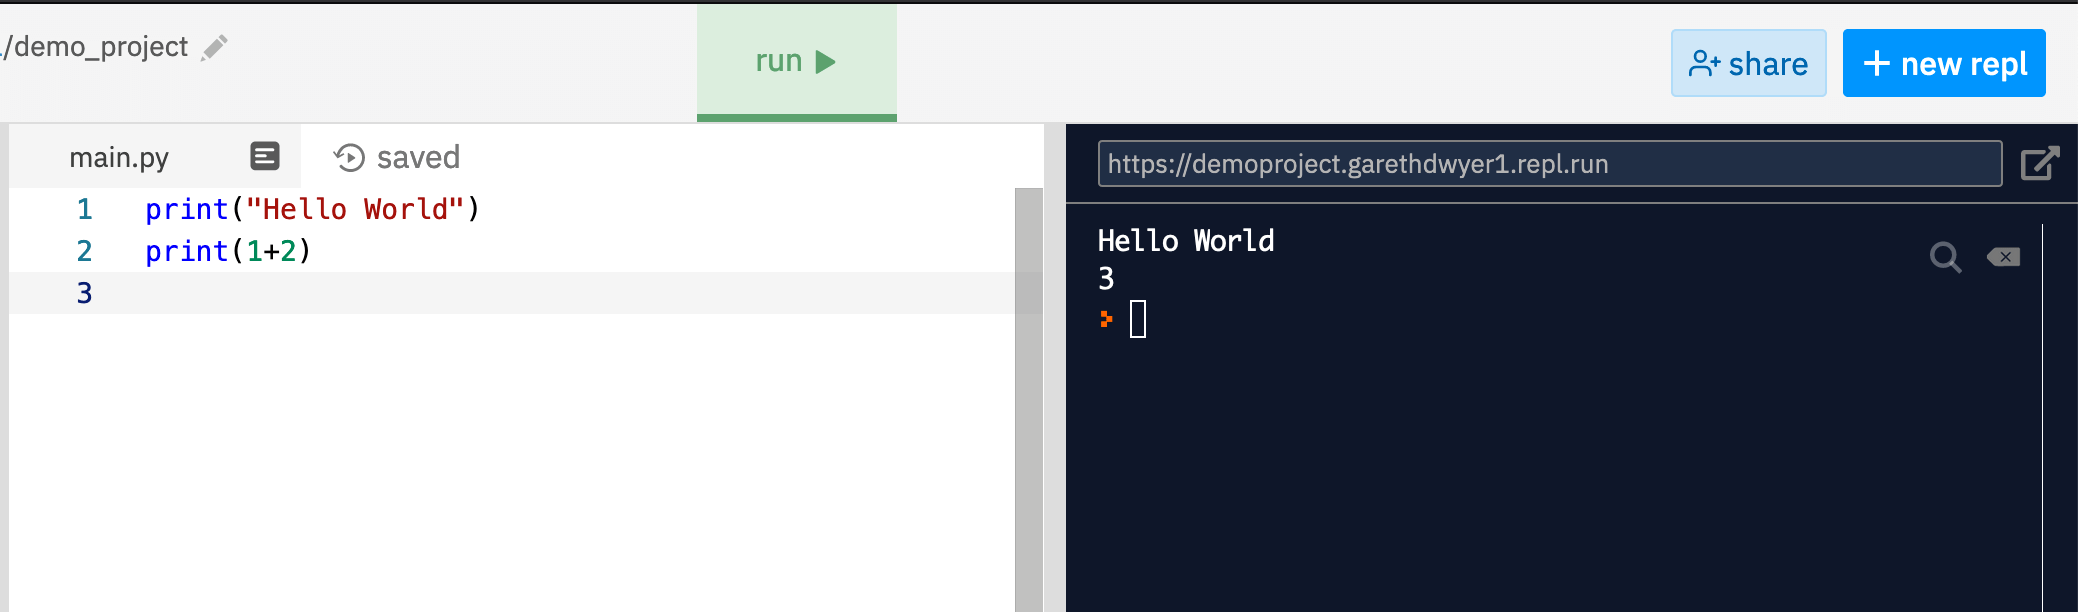
Your script will run and the output it generates will appear on the right pane (pane 3). Our code output the phrase “Hello World” (it’s a long-standing tradition that the first program you write prints the string ‘hello world’), and then output the answer to the sum 1 + 2.
If you got your screen to look like this image, congratulations! You’ve taken your first step to becoming a computer programmer!
Running code from replit.com’s REPL
In computer programming, a REPL is a read-eval-print loop, and a REPL interface is often the simplest way to run short computer programs (and where replit.com got its name).
While in the previous example we saved our code to a file and then executed the file, it’s sometimes quicker to execute code directly.
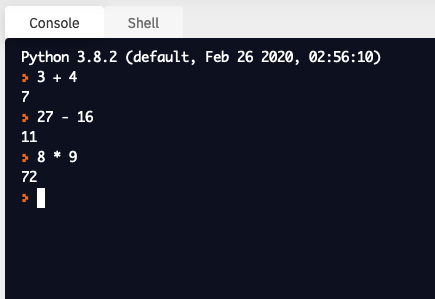
You can type code in the right-hand pane (pane 3) and press the “Enter” key to run it. Take a look at the example below where we print “Hello World” again and do a different sum, without changing our code file.
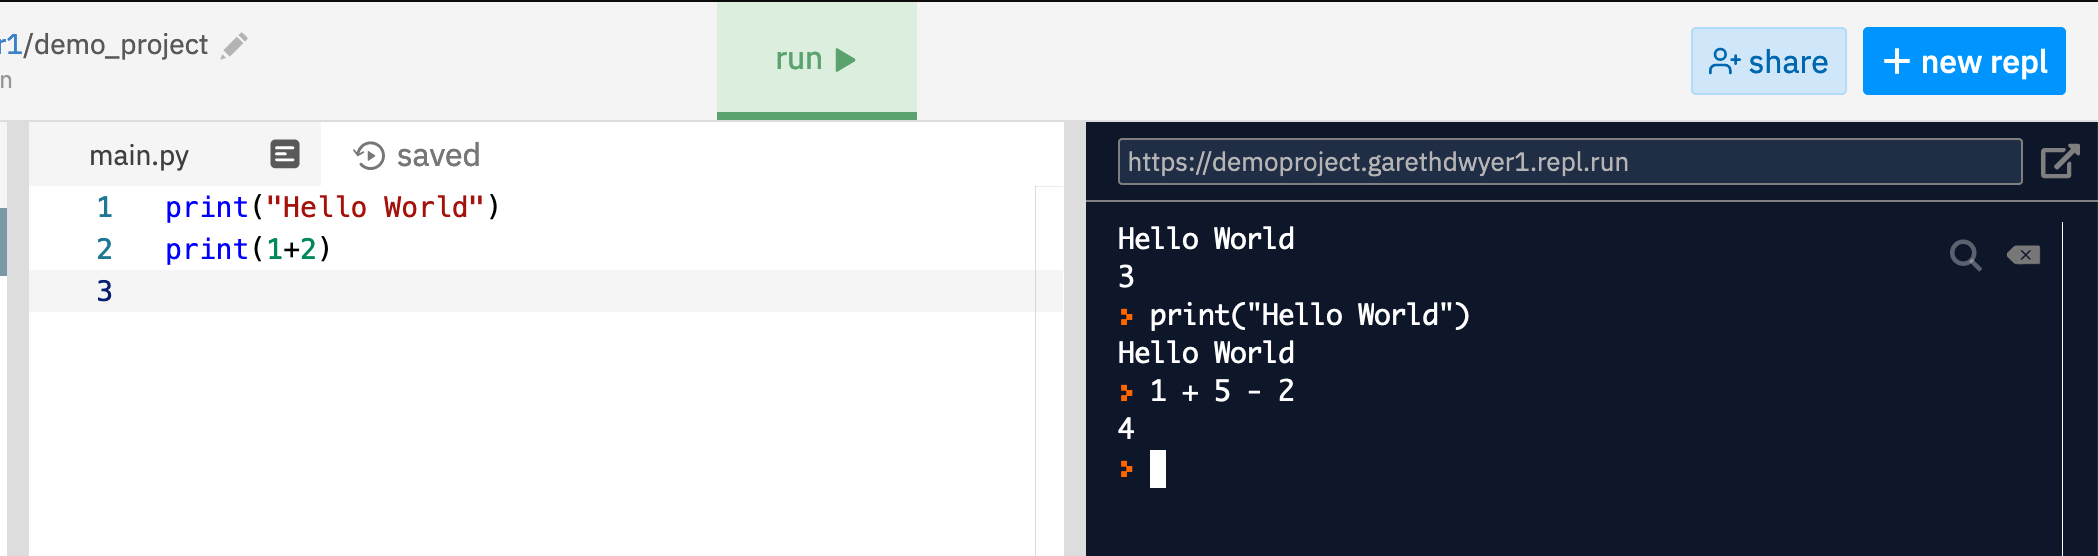
This is useful for prototyping or checking how things work, but for any serious program you write you’ll want to be able to save it, and that means writing the code in a file like in our earlier example.
In this class, we will spend a lot of time during lecture and lab entering Python commands into the REPL in Pane 3 rather than in the editor in Pane 2. In your weekly problem sets, you will spend most of your time entering commands into the editor, testing them with the “Run” button.
We will sometimes refer to the REPL as “Interactive Python” or the “Python Sandbox”. Resist calling it the “Python shell,” which you will also sometimes hear, because we’ll meet another tool called the “shell” in a few weeks.
In our book, we depict commands at the REPL using three greater-than signs, like the following:
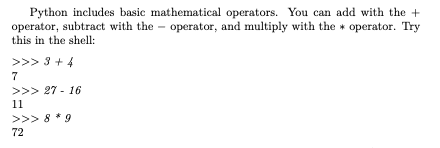
This is the same as entering the following in replit.com:
main.py and other files
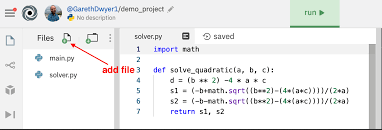
The green “Run” button reads a file called main.py for Python commands to run one-at-a-time, from top to bottom. You can also add additional Python files by clicking the add file button and selecting a name for the new file, such as solver.py (all Python files should end .py):
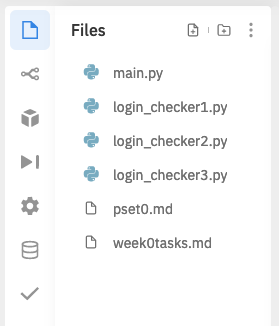
Typically, our problem sets will require you to solve multiple tasks, each one in a separate file named according to our precise instructions. For example, for your first problem set, Problem Set 0, you will be asked to solve three tasks in files called login_checker1.py, login_checker2.py, and login_checker1.py. When you are working on this problem set, your Files pane will look like this:
Because the “Run” button looks only in main.py, you need to add Python instructions to main.py, telling Python to run the commands in the other files. The Python command to do so is import, as follows:
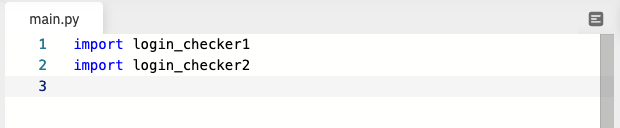
Notice that you omit the .py part of the filename when you use the import command. In this example, clicking “Run” would first open login_checker1.py and run all of the commands it contains and second open login_checker2.py and run all of the commands it contains. It wouldn’t run the commands in login_checker3.py.
I don’t have reliable internet! What do I do?
replit.com requires a browser and an internet connection to work. There is no offline version of replit.com. This means that you can work on the material for this class only when you are connected to a live internet connection. If you don’t have reliable internet, what can you do?
The first, admittedly cold-hearted answer is, you’re probably out of luck. replit.com is a key part of this class, so you may struggle to complete the work without reliable internet.
The second, slightly more charitable answer is we might be able to give you a workaround, one requiring you to install Python and a text editor (we prefer VS Code) on your computer, which will allow you to code completely offline. We really don’t recommend it, though! You will constantly be faced to adapt our replit.com-centric examples to your bespoke toolkit, which will add a layer of frustration to the class.
If you are considering the non-replit.com path, please contact the Professor or Head TA for the class, and we can discuss the pros and cons.
Disclaimer: I borrowed liberally from the replit.com documentation, including lifting a few screenshots wholesale, in creating this page. I assume they won’t object because, hey, free marketing! Aside from being a paying customer, I have no relationship with the people who run replit.com. If they want to throw me some service credits to thank me for the unsolicited marketing, they should feel free to reach out to me!